Servlet생성은 생략 한다.
데이터를 삽입하는 코드이다.
1
2
3
4
5
6
7
8
9
10
11
12
13
14
15
16
17
18
19
20
21
22
23
24
    private Connection con;
	private PreparedStatement pstmt;

	String driver = "com.mysql.jdbc.Driver";
	String url = "jdbc:mysql://localhost:3307/dbschema이름?&serverTimezone=UTC";
	String userid = "사용자 ID";
	String passwd = "비밀번호";

	@Override
	public void init(ServletConfig config) throws ServletException {
		try {
			System.out.println("연결 시작"); //연결 시작을 알기 위함

			Class.forName(driver);
			con = DriverManager.getConnection(url, userid, passwd);

			String sql = "INSERT INTO emp VALUES(?,?,?,?);";
			pstmt = con.prepareStatement(sql);

			System.out.println("pstmt선언"); //pstmt선언까지 이상 없음을 알림
		} catch (Exception e) {
			e.printStackTrace();
		}
	}
보통 localhost:3306이지만 초기에 설치할 때 문제가 생겨 3307로 하였다.
Class.forName으로 드라이버가 어떤 것인지 넣어준다.
getConnection으로 개발자의 데이터베이스 위치, id, pw를 넣고 연결을 시도한다.
String sql –> 이 프로젝트에서 필요한것은 데이터를 넣는 명령이기 때문에 INSERT를 사용하였다.
1
2
3
4
5
6
7
8
9
10
11
12
13
14
15
16
17
18
19
20
21
22
23
24
25
26
27
28
29
30
31
32
33
34
35
protected void doPost(HttpServletRequest request, HttpServletResponse response)
			throws ServletException, IOException {
		// TODO Auto-generated method stub

		// request객체로 들어온 데이터를 가공

		request.setCharacterEncoding("utf-8");
		String id = "id";
		id = request.getParameter("id");
		String name = request.getParameter("name");
		int salary = Integer.valueOf(request.getParameter("salary")); //int를 받기 위함
		String depart = request.getParameter("depart");

		try {
			System.out.println("데이터 입력 시작");
			pstmt.setString(1, id);
			pstmt.setString(2, name);
			pstmt.setInt(3, salary);
			pstmt.setString(4, depart);
			pstmt.executeUpdate(); //명령 실행
			pstmt.close();
			con.close();

			response.setContentType("text/html;charset=EUC-KR");
			PrintWriter out = response.getWriter();
			out.println("<html><body>");
			out.println("successfully inserted"); //정상처리를 알림
			out.println("</body></html>");

		} catch (Exception e) {
			e.printStackTrace();
			System.out.println("ERROR : " + e);
		}
	}
pstmt.setString은 DB의 각 column에 넣을 데이터를 가지고 있는다.
pstmt.executeUpdate();이 최종적으로 sql명령을 실행하여 DB에 정보를 넣는다.
1
2
3
4
5
6
7
8
9
10
11
12
13
14
15
16
17
18
19
20
21
22
23
<!DOCTYPE html>
<html>
  <head>
    <meta charset="UTF-8" />
    <title>Insert title here</title>
  </head>
  <body>
    <section>
      <h1>데이터 저장 실습</h1>
      <form method="post" action="./saveinfo" name="employee">
        <p>
          <strong>사원 아이디 : </strong>
          <input type="text" name="id" value="id" />
        </p>
        <p><strong>사원명 : </strong> <input type="text" name="name" /></p>
        <p><strong>급여 : </strong> <input type="text" name="salary" /></p>
        <p><strong>부서명 : </strong> <input type="text" name="depart" /></p>

        <input type="submit" value="저 장" />
      </form>
    </section>
  </body>
</html>
action=”./saveinfo”은 호출할 servlet url을 mapping하여 원하는 동작을 연결해 준다. (web.xml에서도 mapping 할 수 있다.)
저장 버튼을 누르면 데이터가 저장되어 실제 MySql에서 저장된 데이터를 볼 수 있다.
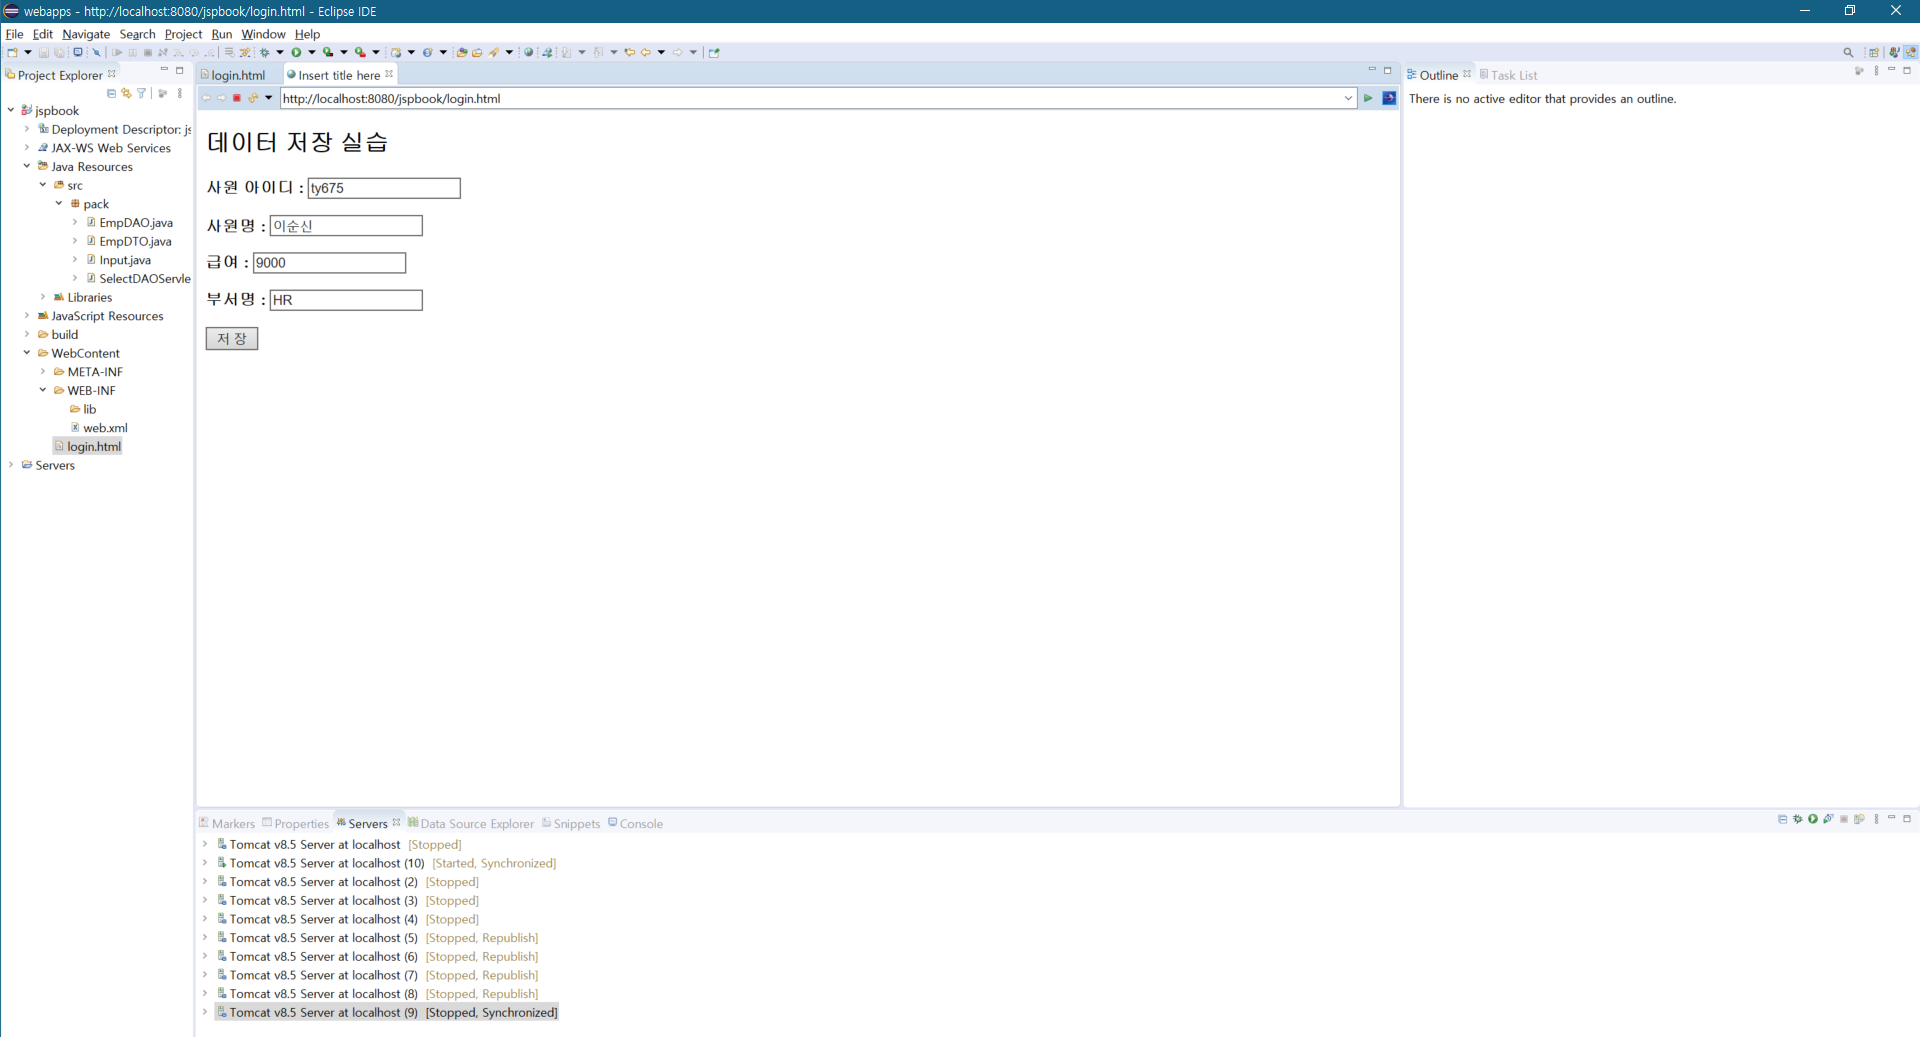
login.html을 실행시켜 데이터를 삽입하기 위한 화면이다.
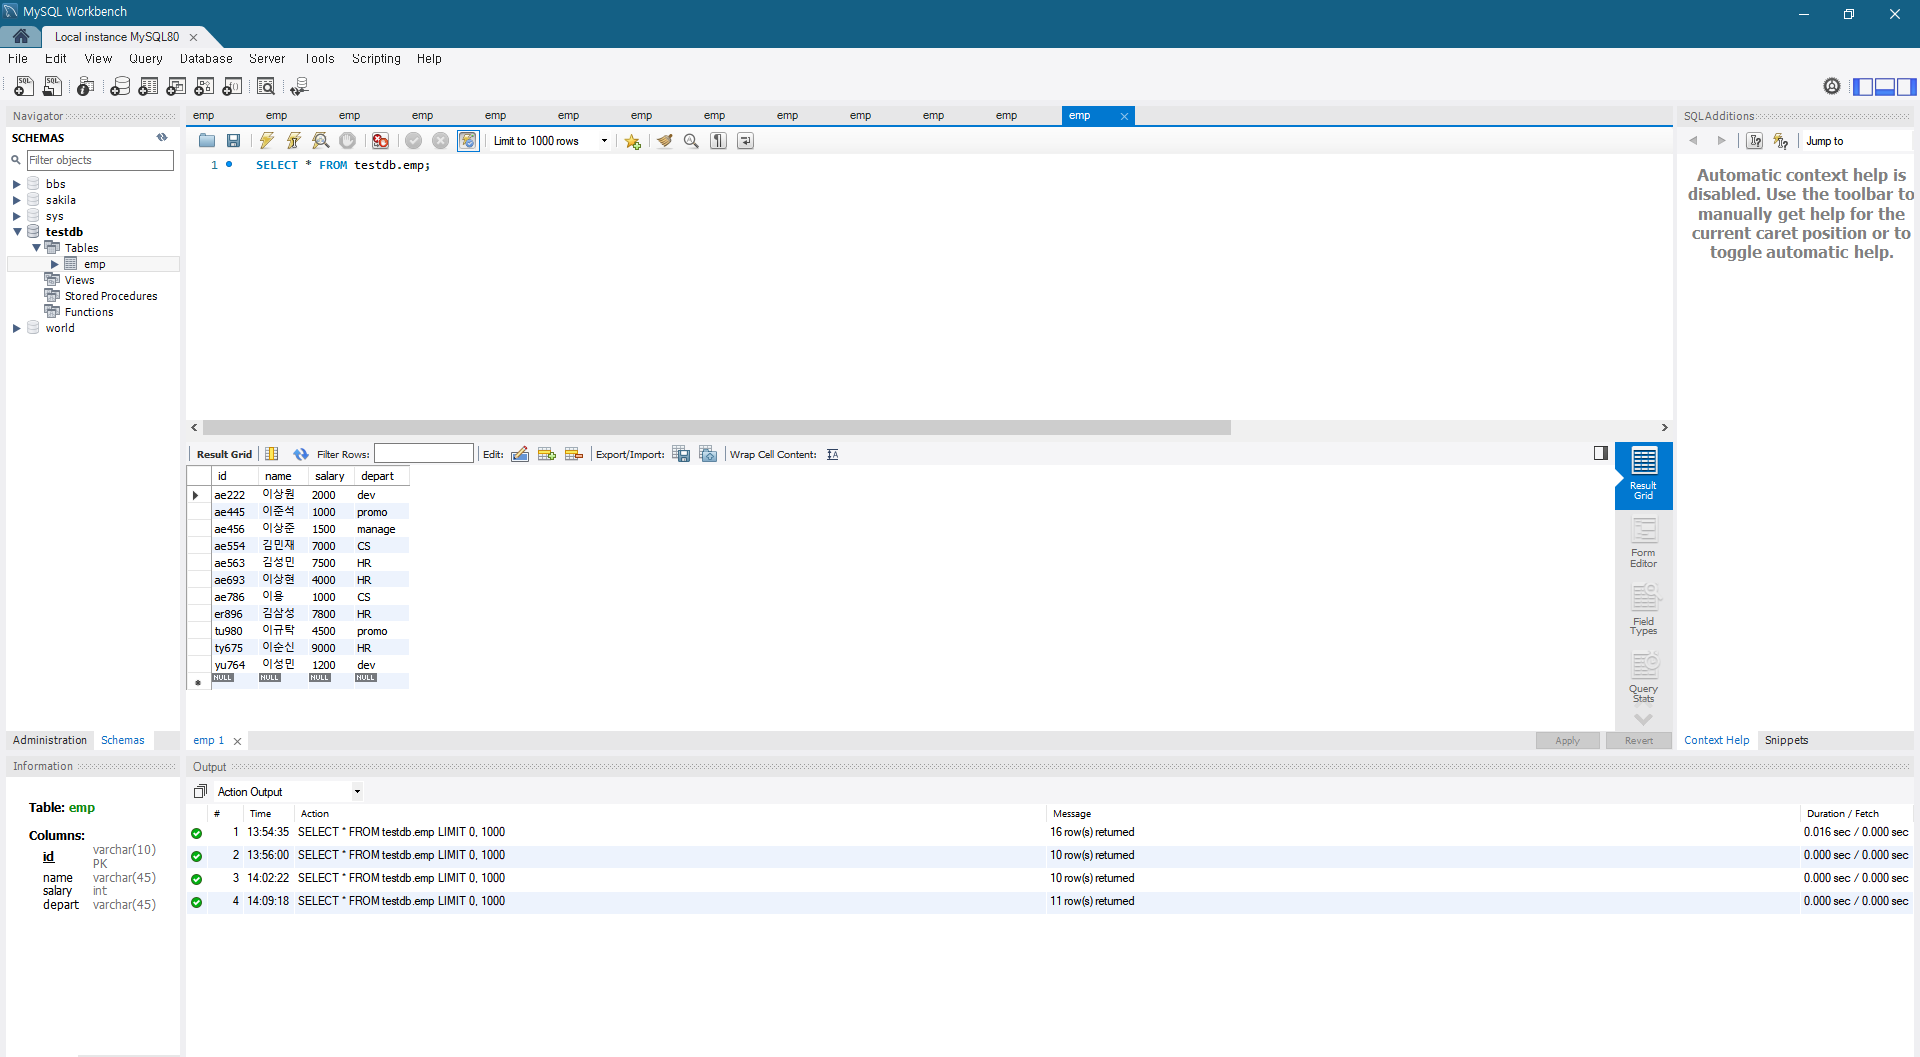
데이터가 추가된 후 mysql workbrench의 화면이다.
이순신 사원의 데이터가 추가된 것을 볼 수 있다.