
NestJS에서 swagger 사용하기
NestJS에서 swagger api 문서 생성은 아주 간편하다. NodeJS에서 swagger를 사용하려면, yaml 파일을 사용하거나 코드에 주석으로 추가해 줘야 했다.
NestJS에서는 데코레이터만 사용해서 swagger api 문서를 생성할 수 있다. 정말 편하다
swagger를 사용하기 위한 패키지 설치
1
yarn add @nestjs/swagger swagger-ui-express
두 패키지를 설치한다.
main.ts
1
2
3
4
5
6
7
8
9
10
11
12
13
14
15
16
17
18
19
20
21
22
23
24
25
26
27
28
29
30
31
32
33
import { NestFactory } from "@nestjs/core";
import { AppModule } from "./app.module";
import "dotenv/config";
import { DocumentBuilder, SwaggerModule } from "@nestjs/swagger";
import { Logger } from "@nestjs/common";
import * as config from "config";
import { GlobalExceptionFilter } from "./exception/globalexception.filter";
import * as cookieParser from "cookie-parser";

async function bootstrap() {
  const logger = new Logger();
  const app = await NestFactory.create(AppModule, { cors: true });

  app.useGlobalFilters(new GlobalExceptionFilter());

  const port = config.get<number>("server.port"); // port config

  const swaggerConfig = new DocumentBuilder()
    .setTitle("users api test")
    .setDescription("nest js swagger test")
    .setVersion("1.0.0")
    .addTag("users")
    .addBearerAuth()
    .build();

  const swaggerDocs = SwaggerModule.createDocument(app, swaggerConfig);
  SwaggerModule.setup("api", app, swaggerDocs);

  app.use(cookieParser());
  await app.listen(port);
  logger.log(`application run in ${port}`);
}
bootstrap();
swagger api 문서 적용을 위해서는 main.ts에 설정을 해 줘야 한다. swaggerConfig에 api 문서에 대한 내용을 지정해 준다. SwaggerModule.setup에 swagger api 문서에 접근할 수 있는 경로를 설정해 준다.
Decorator 사용하기
controller
1
2
3
4
5
6
7
8
9
10
11
12
13
14
15
16
17
18
19
20
21
22
23
24
25
26
27
28
29
30
31
32
33
...
import {
    ApiBearerAuth,
    ApiBody,
    ApiHeader,
    ApiResponse,
    ApiTags,
} from '@nestjs/swagger';
...

@ApiTags('users')
@Controller('users')
export class UsersController {
    constructor(private readonly userService: UsersService) {}

    @Post('registration') // http method
    @UsePipes(ValidationPipe) // validation pipe
    @ApiBody({ type: insertUserDto }) // swagger body
    @ApiResponse({
        status: 201,
        description: 'user created',
    })
    async createUser(
        @Res() res: any,
        @Body() userDto: insertUserDto,
    ): Promise<void> {
        //   사용자 회원가입
        await this.userService.create(userDto);
        const succMessage = 'user created';
        res.status(HttpStatus.CREATED).json(succMessage);
    }
...
}
...으로 되어 있는 부분은 코드가 생략되어 있는 부분이다.
controller에서 @nestjs/swagger에서 데코레이터를 import 해서 사용한다. 각 controller 라우터 바로 위에 추가해 준다.
@Api…로 되어 있는 것들이 swagger api 문서에 적용되는 부분이다. 위 함수에 있는 데코레이터만 간단하게 설명할 것이다.
@ApiBody()
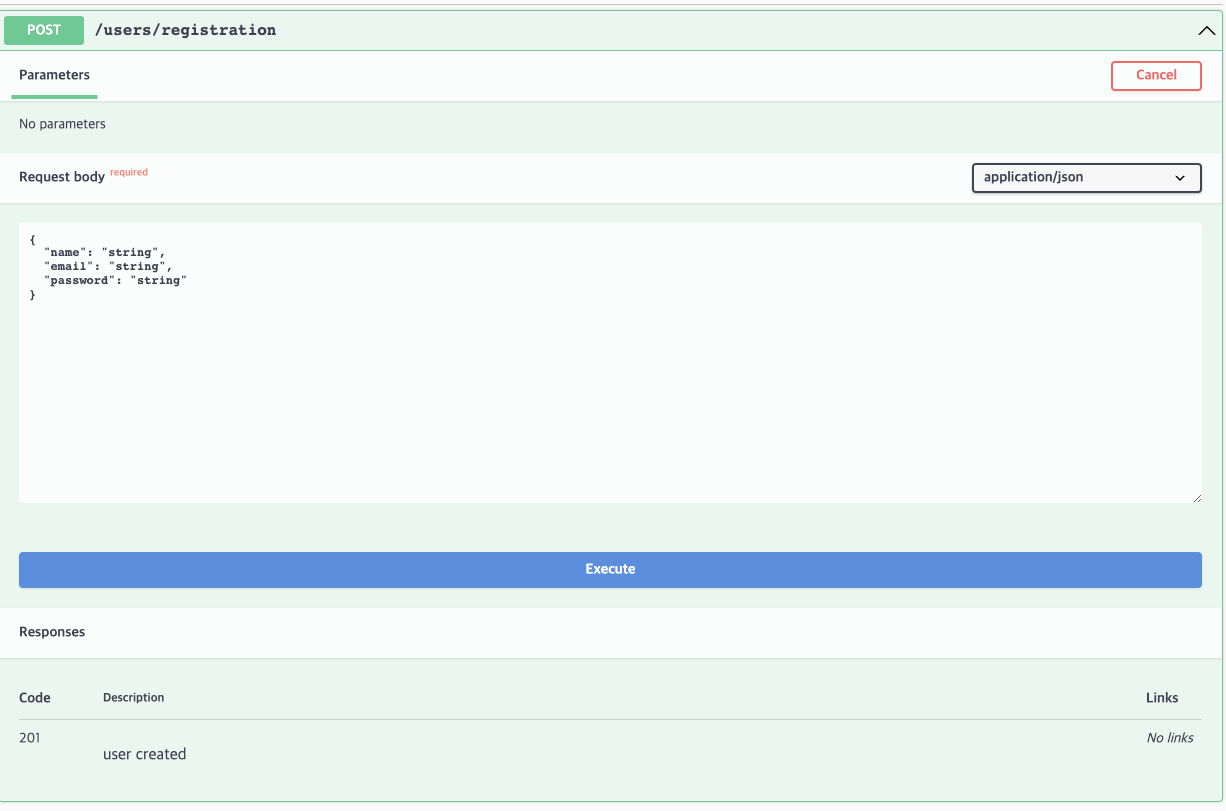
swagger api 문서에서 정해진 body에 값을 넣어 Post 요청을 보낼 수 있도록 할 수 있다.
@ApiResponse()
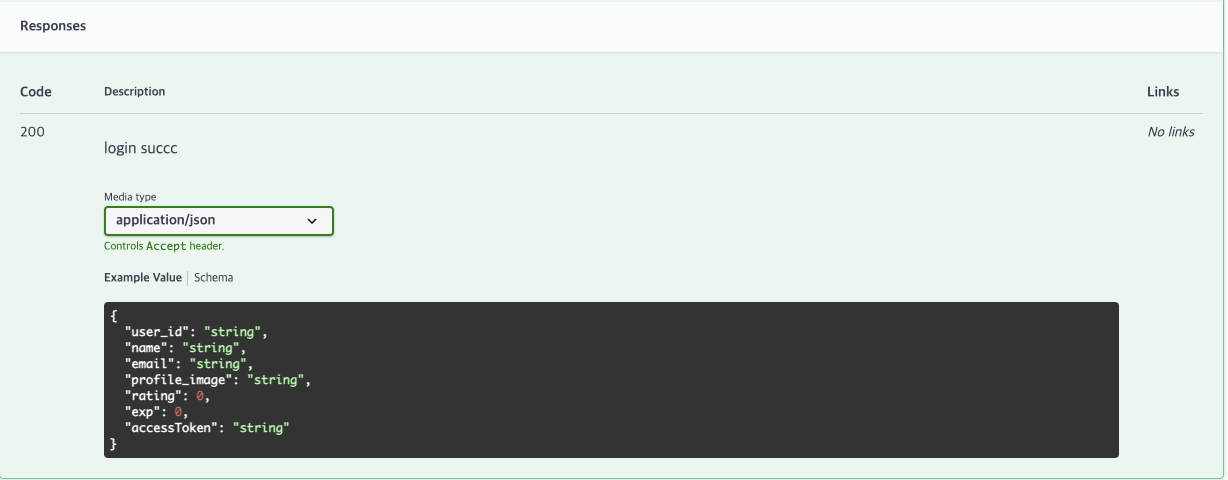
아래 Responses 부분을 보면 응답에 대한 자세한 설명을 적을 수 있다. 응답의 형태도 지정할 수 있다. 응답에 대한 지정은 DTO에 정의한다.
DTO
1
2
3
4
5
6
7
8
9
10
11
12
13
14
15
16
17
18
19
20
21
22
// user.dto.ts
import { ApiProperty } from "@nestjs/swagger";

export class currentUserInfo {
  @ApiProperty({ description: "사용자 고유 아이디", type: String })
  user_id: string;

  @ApiProperty({ description: "사용자 이름", type: String })
  name: string;

  @ApiProperty({ description: "사용자 이메일", type: String })
  email: string;

  @ApiProperty({ description: "사용자 프로필 이미지", type: String })
  profile_image: string;

  @ApiProperty({ description: "사용자 등급", type: Number })
  rating: number;

  @ApiProperty({ description: "사용자 경험치", type: Number })
  exp: number;
}
Response에 각 필드에 @ApiProperty를 붙여준다. 설명과 type을 설정해 줄 수 있고, 다른 옵션들도 사용할 수 있다.