
환경에 따른 설정 파일 분할 적용?
팀 프로젝트를 진행하다보면 설정 파일에서 형상 관리를 하면서 충돌이 난다. 로컬에서 테스트하는 데이터베이스나 포트가 다른 경우 저장소에서 pull 받을 때마다 수정해줘야 하는 귀찮음이 있다.
귀찮음을 해소하면서 프로젝트의 환경을 개발, 운영, 로컬로 나눌 수 있는 설정파일 분할 적용에 대해 알아보자 !
spring boot의 설정 파일 application.yml
1
2
3
4
5
6
7
8
9
spring:
  config:
    activate:
      on-profile: local

server:
    port: 8080

jpa, datasource...
기본적인 설정파일이다. 서버의 포트와 데이터베이스 설정 등을 정의할 수 있다.
이번 포스팅에서는 개발, 운영, 로컬을 정의해본다.
환경 변수 파일 만들기
환경 변수 파일을 resources폴더 아래에 application-dev.yml, application-local.yml, application-prod.yml을 만든다.
1
2
3
4
5
6
7
8
9
10
11
12
13
14
# application-dev.yml
# 개발
spring:
  config:
    activate:
      on-profile: dev
  datasource:
    driver-class-name: com.mysql.cj.jdbc.Driver
    url: ...
    username: ----
    password: ----

server:
  port: 8090
1
2
3
4
5
6
7
8
9
10
11
12
13
14
# application-prod.yml
# 운영
spring:
  config:
    activate:
      on-profile: prod
  datasource:
    driver-class-name: com.mysql.cj.jdbc.Driver
    url: ...
    username: ----
    password: ----

server:
  port: 9999
1
2
3
4
5
6
7
8
9
10
11
12
13
14
# application-local.yml
# 로컬
spring:
  config:
    activate:
      on-profile: local
  datasource:
    driver-class-name: org.h2.Driver
    url: ...
    username: ----
    password: ----

server:
  port: 8080
각 서버 마다 포트와 데이터베이스를 다르게 적용하였다. 세 가지 환경을 나눠 서버를 개발 할 수 있는데 환경을 나눠 실행하는 방법은 Run Configuration에서 profile을 설정해주면 된다.
spring.config.active.on-profile에 dev, local, prod와 같이 환경에 대한 이름을 설정해 주면된다.
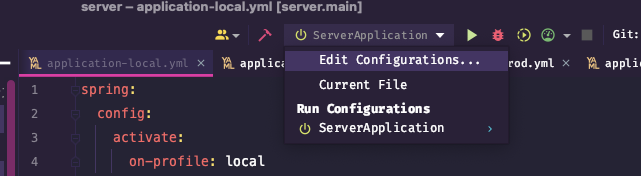
Edit Configuration
Active profiles
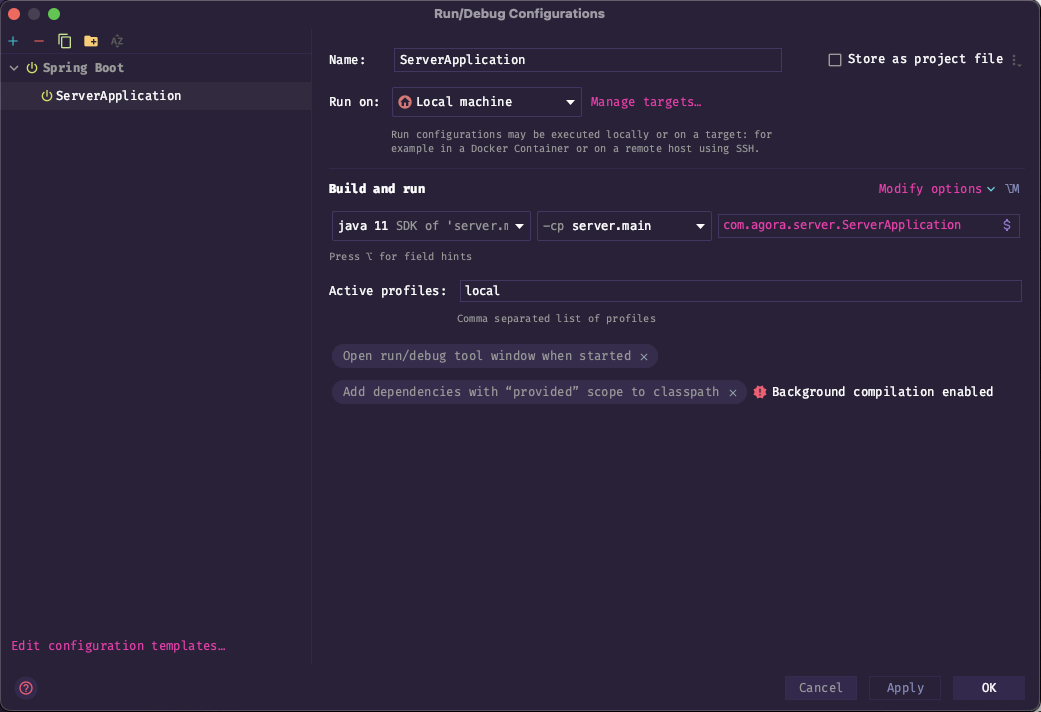
상단에 Edit Configuration을 열어 profile에 dev, local, prod 중 하나를 넣어 실행하면 환경에 따라 서버를 실행할 수 있다.
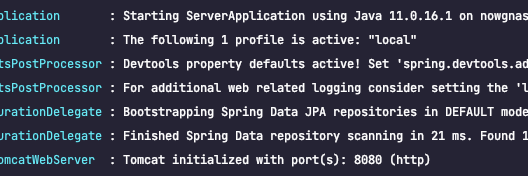
local을 넣어 실행하게되면 로그에 profile이 local로 찍히게 된다.
로컬에서 개발하는 환경은 저장소에 올라가면 안되므로 .gitignore에 넣어 관리한다.
spring boot env 파일 설정하기
개발을 진행하다보면 토큰을 만드는 secret 키나 api 요청하는 개인 키가 필요하다. 이런 키는 저장소에 올리지 않고 사용해야 한다.
설정파일에 넣고 .gitignore에 추가해 개발을 해야 한다. 사용자 정의 환경변수 파일을 만들고 spring boot가 이 설정파일들을 알게 해보자
env.yml
1
2
3
4
5
6
7
8
9
10
11
12
13
14
oauth:
  naver:
    redirect:
      url: https://nid.naver.com/oauth2.0/token
      header: Content-type
      header-value: application/x-www-form-urlencoded;charset=utf-8
      grant-type: authorization_code
    get-info:
      url: https://openapi.naver.com/v1/nid/me
      header-type: Content-type
      header-value: application/x-www-form-urlencoded;charset=utf-8
      auth:
        header-type: Authorization
        header-value: "Bearer "
먼저 사용자 정의 환경 변수 파일이다. resources 폴더에 추가하여 사용한다.
EnvConfig
1
2
3
4
5
6
7
8
9
10
public class EnvConfig implements PropertySourceFactory {
    @Override
    public PropertySource<?> createPropertySource(String name, EncodedResource resource) throws IOException {
        YamlPropertiesFactoryBean factoryBean = new YamlPropertiesFactoryBean();
        factoryBean.setResources(resource.getResource());
        Properties properties = factoryBean.getObject();
        assert properties != null;
        return new PropertiesPropertySource(Objects.requireNonNull(resource.getResource().getFilename()), properties);
    }
}
PropertySourceFactory의 구현체 YamlPropertiesFactoryBean를 사용해 환경 변수를 잡을 EnvConfig 클래스를 생성한다.
환경변수 파일 위치 잡기
1
2
3
4
5
6
7
8
9
10
11
12
@SpringBootApplication
@PropertySource(value = {
        "classpath:env/env.yml",
				"classpath:env/env-key.yml",
...
}, factory = EnvConfig.class)
public class ServerApplication {

    public static void main(String[] args) {
        SpringApplication.run(ServerApplication.class, args);
    }
}
spring boot 애플리케이션 파일에서 @PropertySource를 사용해 yml파일의 위치를 추가해 준다.
value 속성에 환경변수가 필요한 파일들의 위치를 지정해 주면 되는데 resources의 경로는 classpath:로 시작하며 spring boot가 잡을 파일까지 경로를 추가해 주면된다.
factory 속성은 위에서 정의해준 EnvConfig 클래스를 넣어주면 된다
환경 변수 사용하기
jwt 토큰에 사용할 secret 키를 환경변수에 추가하여 사용해 보자
1
2
3
4
# env.yml
jwt-config:
  secret: sldiufhwkejfb
  header-prefix: "Bearer "
환경 변수에 위와 같은 구조로 값을 정의해 준다.
1
2
@Value("${jwt-config.secret}")
private String jwtSecret;
필드에서 @Value 어노테이션을 사용해 ${}안에 계층 구조에 따라 정의해주면 된다. .yml 파일에서 계층 구조의 구분은 .으로 한다.