swgger를 사용해보자
이전 프로젝트에서는 postman을 이용해 백엔드 api 문서를 생성했다. postman도 편하고 잘 동작하지만, swagger api를 사용해보려고 한다. yml파일을 생성해 하나의 파일에 정의하는 방식과 라우터 파일들에 직접 정의 할 수 있는 차이가 있다. swagger api 문서 자동화를 알아본다.
swagger API 문서 자동 생성하기
swagger api 문서를 yaml 파일에 정의해서 사용할 수 있지만, 각 라우터 코드에 정의해서 사용할 수도 있다. routes 폴더 아래의 각 라우팅 파일에 주석으로 사용하는 방법이다.
패키지 설치
1
yarn add -D swagger-jsdoc swagger-ui-express
swagger-jsdoc과 swagger-ui-express 패키지를 개발 의존성으로 설치해 준다.
swagger.js
1
2
3
4
5
6
7
8
9
10
11
12
13
14
15
16
17
import swaggerUi from "swagger-ui-express";
import swaggereJsdoc from "swagger-jsdoc";

const options = {
  swaggerDefinition: {
    openapi: "3.0.0",
    info: {
      title: "Test API",
      version: "1.0.0",
      description: "Test API with express",
    },
    basePath: "/",
  },
  apis: ["./src/routes/*.js", "./src/db/models/*.js"],
};
const specs = swaggereJsdoc(options);
export { swaggerUi, specs };
src폴더 아래에 swagger.js를 생성해 위 코드를 작성해 준다. swaggerDefinition은 swagger api 문서의 버전과 설명을 정의하고, apis는 swagger의 주석이 존재하는 경로를 정의해 준다. 이전과 다른 점은 swaggerDefinition에 openapi와 basePath가 추가된 것이다.
app.js에 swagger 라우팅 경로 지정
1
2
3
import { swaggerUi, specs } from "./swagger";
...
app.use("/swagger", swaggerUi.serve, swaggerUi.setup(specs));
app.js에 swagger.js파일을 import 하고, /swagger 경로로 swagger api 문서 자동화를 할 수 있게 정의해 준다.
router에 swagger api 정의
post
1
2
3
4
5
6
7
8
9
10
11
12
13
14
15
16
17
18
19
20
21
22
23
24
25
26
27
28
29
30
31
32
33
34
35
36
// routes/postRouter.js
/**
 * @swagger
 * tags:
 *  name: Post
 *  description: Post API
 */
...
/**
 * @swagger
 * paths:
 *  /newpost:
 *   post:
 *    tags: [Post]
 *    summary: create new post
 *    requestBody:
 *      description: creat new post
 *      required: true
 *      content:
 *        application/json:
 *          schema:
 *              $ref: '#/components/schemas/Post'
 *    responses:
 *      200:
 *       description: 새 게시글 생성 성공!!
 *       content:
 *          application/json:
 *              schema:
 *                  type: object
 *                  properties:
 *                      status:
 *                          type: string
 *                      payload:
 *                          $ref: '#/components/schemas/Post'
 */
postRouter.post("/newpost", postController.addPost);
requestBody 부분이 해결이 안되었었는데, schema 정의가 잘 동작하면서 해결되었다. .yml 파일에 작성하는 swagger 문서와 크게 다르지 않다. 주석 윗 부분에 @swagger를 넣어 swagger 문서인 것을 정의하고 모든 라우팅은 paths를 적어줘야 한다. 스키마 reference에 대해서는 아래에서 설명한다.
get
1
2
3
4
5
6
7
8
9
10
11
12
13
14
15
16
17
18
19
20
21
22
23
24
25
26
27
28
29
// routes/postRouter.js
/**
 * @swagger
 * paths:
 *  /post/id/{id}:
 *   get:
 *      tags: [Post]
 *      summary: find post by post_id
 *      parameters:
 *          - name: id
 *            in: path
 *            type: string
 *            description: post_id
 *      responses:
 *          200:
 *           description: succ
 *           content:
 *              application/json:
 *                  schema:
 *                      type: object
 *                      properties:
 *                          status:
 *                              type: string
 *                          payload:
 *                              $ref: '#/components/schemas/Post'
 *
 */

postRouter.get("/post/id/:id", postController.getPostByPostId);
get 요청도 post와 다를게 크게 없다. 파라미터 부분이 추가되고, 나머지는 post와 다르지 않다.
schema 정의
1
2
3
4
5
6
7
8
9
10
11
12
13
14
15
16
17
18
19
20
21
22
23
24
25
26
27
// db/models/post.js
/**
 * @swagger
 * components:
 *  schemas:
 *    Post:
 *      type: object
 *      required:
 *          - user_id
 *          - week
 *          - tag
 *          - title
 *      properties:
 *          user_id:
 *           type: string
 *          week:
 *           type: string
 *          tag:
 *           items:
 *              type: string
 *          title:
 *            type: string
 *
 */
module.exports = (sequelize, DataTypes) => {
...
}
schema는 위와 같이 정의한다. .yml 파일에서 정의하는 것과 동일하다. tag는 items를 가지고 있는데, items는 배열을 뜻하는 것이다. mysql에 배열이 저장되지 않지만, 요청과 응답에서 배열 형태를 사용하기 때문에 배열로 적어 두었다. schema 정의 위치는 원하는 곳에 하고 swagger.js에서 api 부분 경로만 수정해주면 된다.
정리
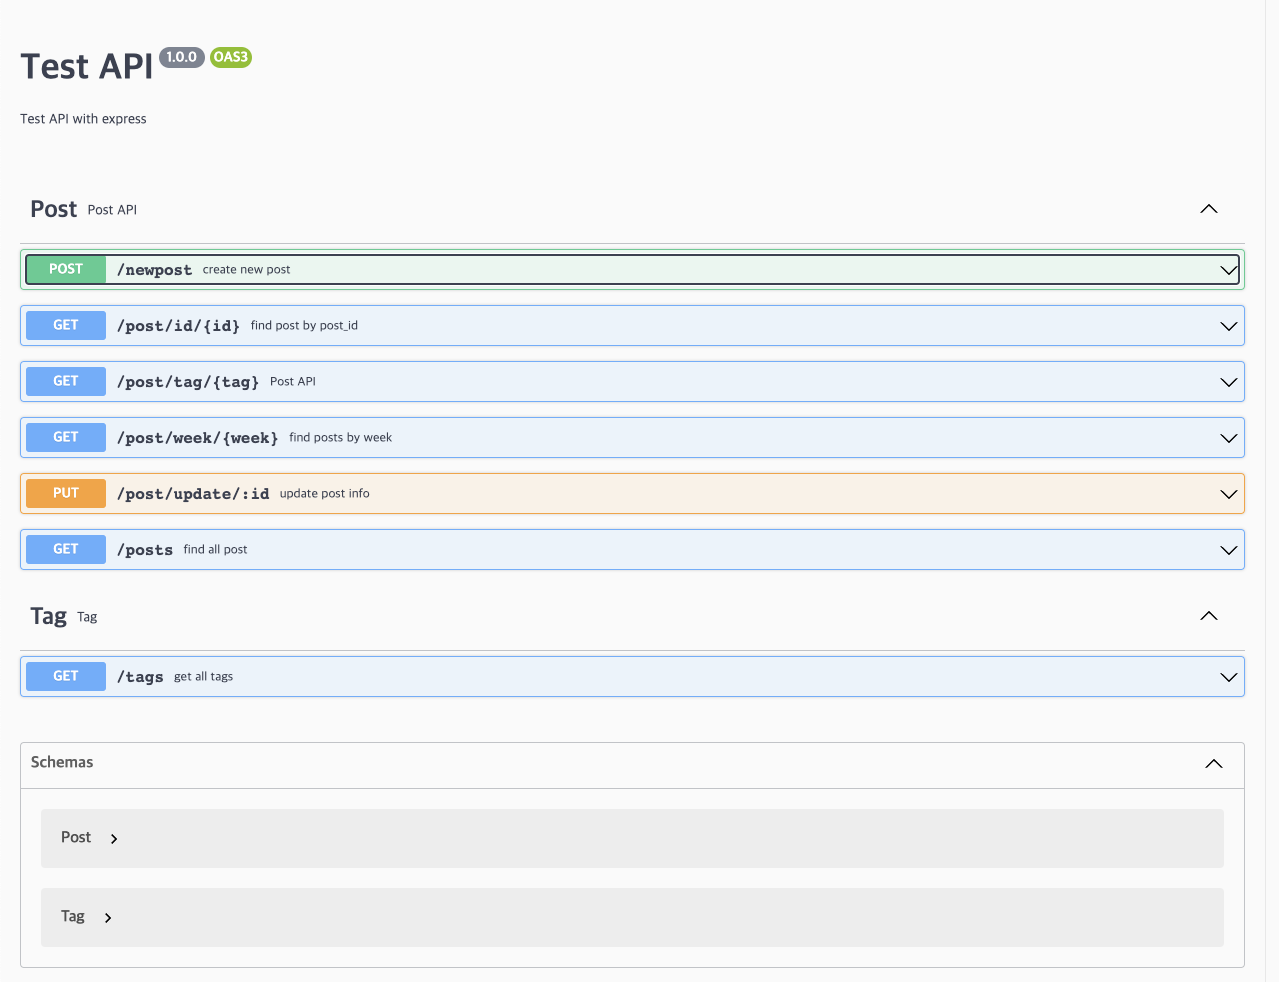
저번 시도에서 schema가 보이지 않았던 것을 swaggerDefinition 부분에서 openapi와 basePath를 추가하는 방법으로 해결했다.